Desktop Edition - Quick Start Guide
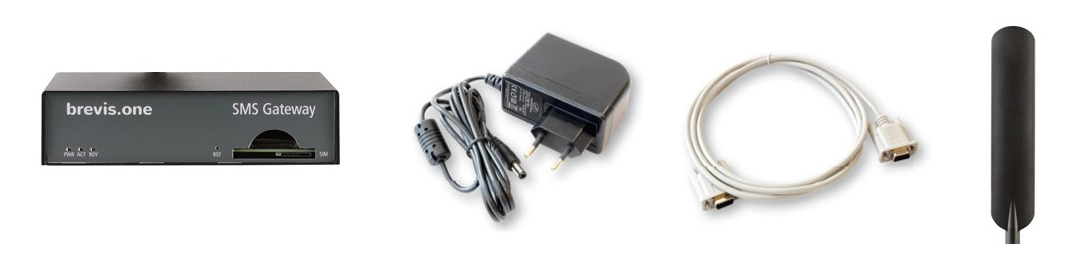
scope of delivery
- brevis.one SMS Gateway - Desktop Edition
- Power supply unit
- RS 232 cable
- Antenna
brevis.one SMS Gateway
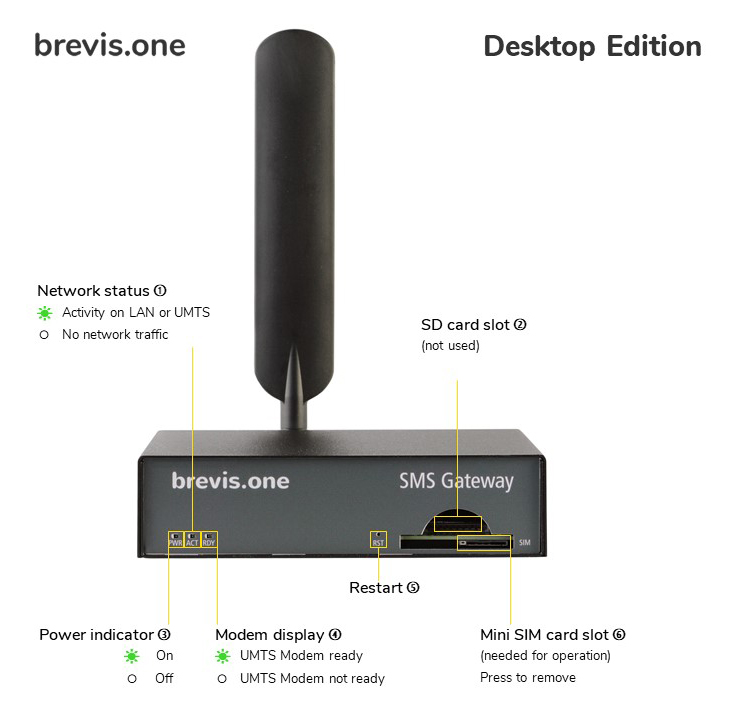
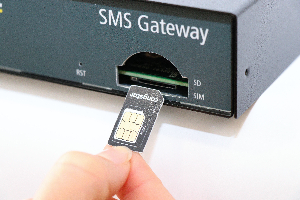
1. Insert the SIM card
ê IMPORTANT: Before inserting the SIM card, please remove the PIN from the SIM card and disconnect the gateway from the power. Here you should wait 2 minutes until the capacitors have discharged and you insert the SIM card. This also applies if you change the SIM card! Check whether the SIM is correctly engaged. A clicking noise must be audible.
- Insert the SIM card (Standard SIM).
2. Screw on the antenna
- Screw the antenna to the SMA connector.
3. Connect the network cable
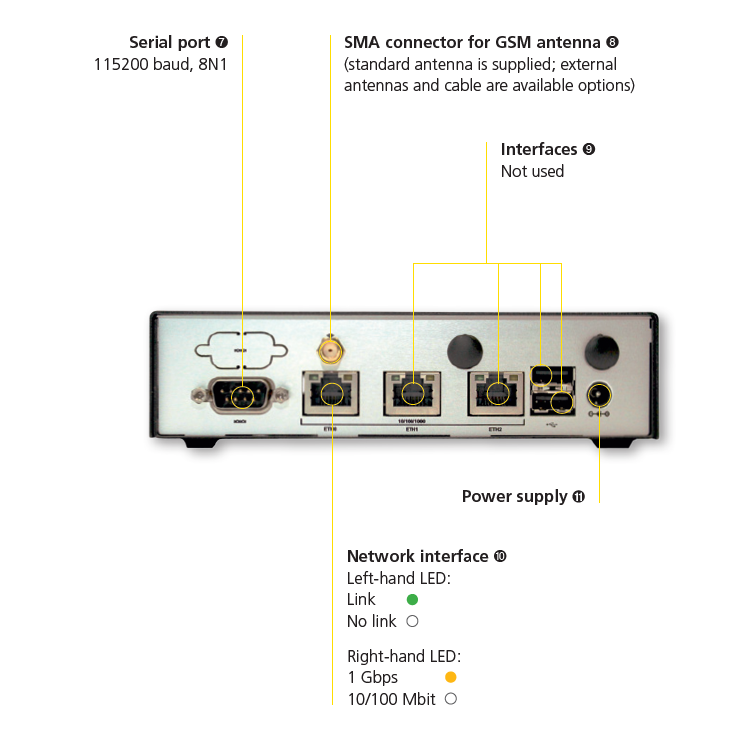
- Connect an RJ-45 network cable. Please use the Ethernet port ETH0.
The ports ETH1 and ETH2 are without function!
Important: Under Windows, the current driver for USB-SERIAL CH340 (as of 19.11.2024) of the console cable can cause problems. If you receive “Error 31” in PuTTY, you can use the “Xshell” program if it is available to you. Alternatively, uninstall the driver and use version 3.4.2014.8 from 08.08.2014.
You can find the driver at (yellow marked file) https://learn.sparkfun.com/tutorials/how-to-install-ch340-drivers/all

4. Connect the power cable
- Connect the power cable to the device. The power indicator will now light up.
5. Network configuration
- If your network has a DHCP server, it can issue an IP address to the brevis.one SMS Gateway. If no DHCP is available, the device will start with the standard IP 192.168.1.1.
- If you do not know the IP address assigned by the DHCP, you have the option of requesting it via the serial port. For this purpose, connect your PC using a terminal program (e.g. PuTTY) and the port cable with the Gateway.
- The speed of the interface here is 115200 baud (8N1).
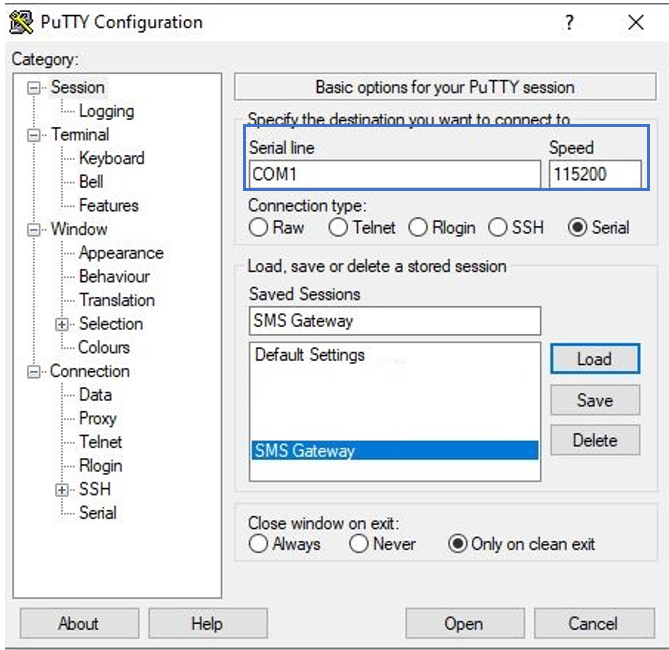
- Klick the open button and type Enter.
- A text-based interface appears in which the current IP address is shown under the Version menu option. The IP address can be altered as you wish under the Network menu option.
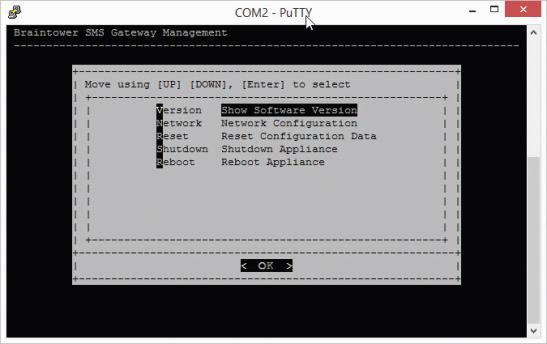
- If you make the network settings using the serial port, they will only be temporary and will be lost when the Gateway is restarted.
- Permanent network settings should be made in the web interface.
- You can now access the web interface via the IP address.
Log in here with the following information:
user name: admin
password: admin
6. Licensing
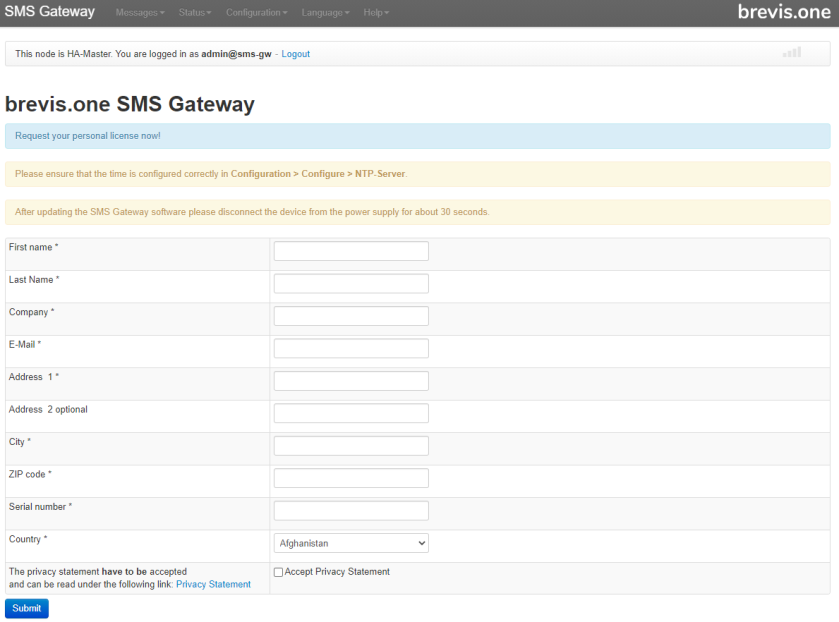
- After logging into the web interface, you must request a licence for your Gateway. As long as this process has not been completed you will constantly be requested to do so after logging in.
- For this purpose, please complete the form and press on the Request button. The Serial number you will find on the Gateway (Where can I find the serial number of my SMS Gateway?).
- You will then receive a licensing request which you can request through the Servicedesk (https://brevis.one/en/licreq-en/).
- After our licensing team has processed the request, you will receive a licensing file which you should upload at this point to the SMS Gateway.
7. SIM card
ê ATTENTION: Please remove the PIN from the SIM card before inserting it! We recommend not using a PIN to avoid problems with sending text messages.
- Select SIM card from the Configuration menu option.
- Select Reboot / shut down from the Configuration menu option.
- Restart the SMS Gateway.
8. Send a test message
- Enter the IP in your browser and log in again.
- Then select send to number from the SMS menu option.
- You can now send a text message on the screen which then appears by entering a telephone number and a message.
- Further assistance is provided in the Help menu option.
Related articles